

If you’ve been into 3D printing for a while, chances are you’ve wondered about a 3D scanner for beginners. They promise to take real-world objects and turn them into printable models. But do they actually work?
In this post, I’ll share my first hands-on experience with the Moose Light by 3D Maker Pro, from setup to printing the final model. Spoiler: the results were much better than I expected.

How the Moose Light 3D Scanner Works
The Moose Light by 3D Maker Pro uses a series of rapid flashes of near-infrared light to project a grid pattern across the surface of your object. As the light reflects back into the scanner, onboard sensors capture the distortions in the grid. From there, the software calculates millions of data points to map out the object’s shape with up to 0.05 mm accuracy fine enough to pick up subtle curves, edges, and surface textures.
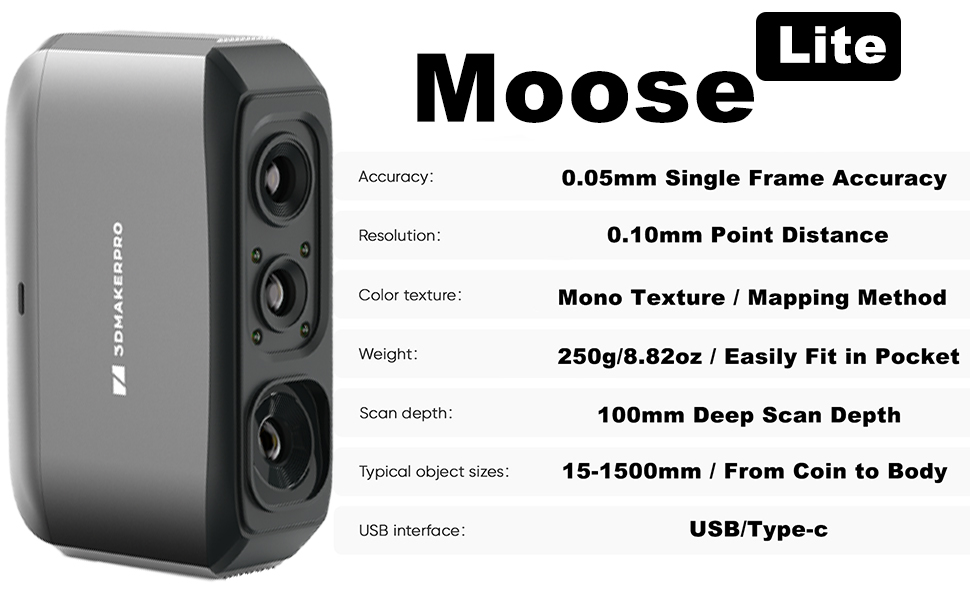
Once captured, the scanner leverages AI-powered algorithms to align and merge the different frames into a single 3D mesh. This means you don’t need to hold the scanner perfectly still or scan in a flawless pattern, the AI compensates for hand movements, fills gaps, and smooths transitions between passes.
For beginners, the included software is surprisingly intuitive. It uses a real-time visual guide that changes color depending on whether you’re too close, too far, or at the optimal scanning distance. This makes it easy to learn the “sweet spot” for capturing detail without overwhelming the hardware.
Another useful feature is the anti-shake module, which reduces motion blur and jitter from handheld scanning. This makes it much easier to capture medium-sized objects like figurines, tools, or small household items without needing a professional turntable setup.
And because it’s a structured light scanner (not laser-based), the Moose Light is safe to use indoors, doesn’t require calibration every time, and works well even in average lighting conditions.
The Scanning & Cleanup Process
After my first scan, the model looked a bit rough. Honestly, I panicked, I’m not a skilled 3D modeler, and I thought I’d need hours of cleanup.
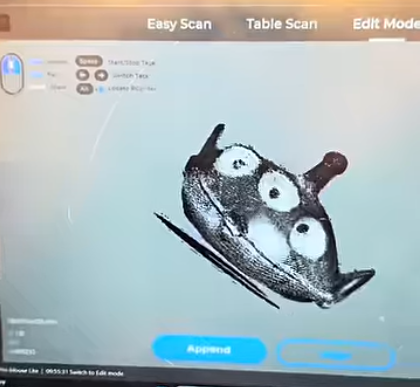
But the 3D Maker Pro software saved me. It has built-in features to:
- Remove floating parts
- Repair gaps
- Smooth surfaces
That meant I didn’t need to dive into Blender or Meshmixer right away. The cleanup was quick and painless.
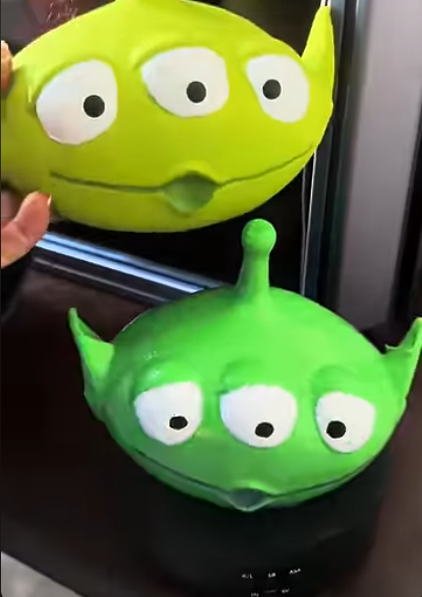
Printing the Scanned Model
I scanned a small alien figure using a rotating turntable. The scanner did pick up part of the turntable, but that was easy to trim off in my slicer.
A few hours later, I had a 3D printed replica of the scan. After a little paint and post-processing, it looked remarkably close to the original.
For a first-time scan, I was seriously impressed.
Final Thoughts: Is the Moose Light Worth It?
For beginners curious about 3D scanning, the Moose Light makes it accessible. It’s not perfect, but the AI-assisted cleanup and ease of use make it a strong option if you want a 3D scanner for beginners.
I’d recommend it if you:
- Want to create 3D printable models of existing objects
- Don’t have experience with manual 3D modeling
- Are looking for an affordable, entry-level 3D scanner
So yes 3D scanners do work, and the Moose Light proves it.
What Should I Scan Next?
This was my first scan ever, and I’m already hooked. What do you think I should try scanning next? Drop your ideas in the comments or tag me on social media @misfit_printing with your suggestions!
Check out the video here and check out more blogs below!
Affiliate Disclaimer: This blog contains affiliate links. If you click through and make a purchase, I may earn a small commission at no additional cost to you. I only recommend products I personally use and believe add value.