
Save 10% at Lava Lab Creations with code MISFIT10.
Affiliate disclosure: This post contains affiliate links. If you purchase something through one of these links, I may earn a commission at no additional cost to you. As an Amazon Associate I earn from qualifying purchases. These commissions help fund future experiments, restorations, and decisions that seem completely reasonable when I first make them.
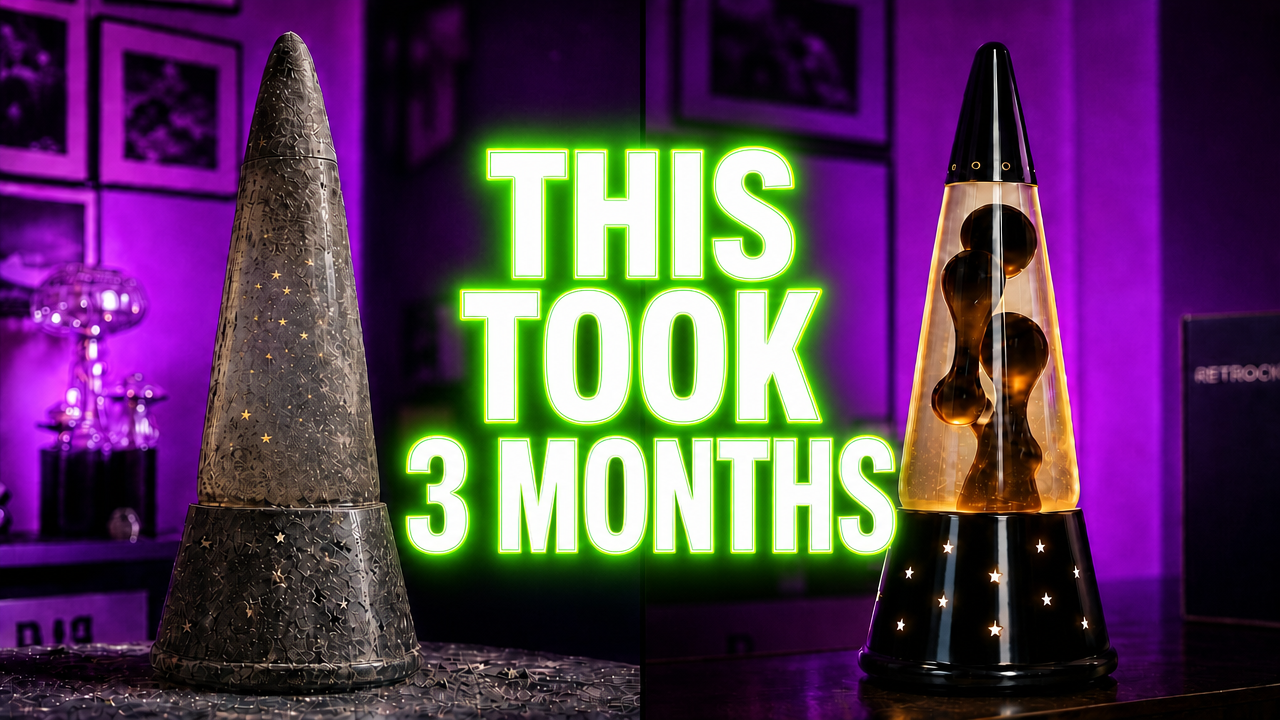
A viewer sent me a vintage Lava Lite Wizard lamp with one fairly straightforward request:
Turn it from a glitter lamp into a lava lamp with black gooey wax.
At least, it sounded straightforward.
Remove glitter. Add lava. Enjoy. Surely nothing could go wrong.
Three months later, I had accumulated a growing failure counter, several incompatible sealing attempts, a collection of suspiciously specific rubber stoppers, and a much better understanding of why glitter lamps and lava lamps are not simply interchangeable liquids in the same fancy bottle.
This post documents what I learned while attempting my first glitter-lamp-to-lava-lamp conversion, including the problems I ran into, the parts that actually mattered, and the changes that finally produced a working lamp.
Important clarification: Wizard lamps were not exclusively glitter lamps. The Wizard was a style of Lava Lite lamp that was sold with both glitter globes and traditional wax-filled lava globes. This particular Wizard happened to be a glitter version, and my goal was to rebuild its globe using lava lamp internals. Historical collector records list the Wizard series from approximately 1998 through 2003 and document both glitter and wax configurations.
Quick answer: Yes, it is possible to convert some vintage glitter lamps into working lava lamps. However, it requires more than replacing the glitter with wax. The globe must be thoroughly cleaned, the new wax and liquid must be compatible, the lamp needs the correct amount of heat, and the closure must safely accommodate expansion without leaking.
What Is a Lava Lite Wizard Lamp?
The Lava Lite Wizard is recognizable by its star-and-moon cutouts and pointy cap, which allow light to shine through the metal base and cap.
The design itself does not tell you whether the lamp originally contained glitter or wax. Collector documentation lists four primary base colors being silver, black, blue, and red and records both glitter and traditional wax-filled versions.
What I was doing was taking one specific glitter-filled globe and attempting to recreate the behavior of a wax-filled version without access to its original factory formula, closure, or internals.
Which is still a spectacularly good way to lose three months.
How Old Is a Vintage Wizard Lamp?
The Lava Library dates documented Wizard production to approximately 1998–2003. That means a Wizard lamp would generally be around 23–28 years old in 2026 when im writing this, although an individual globe or base may be dated more precisely using its original cap markings.
Glitter Lamp vs. Lava Lamp: What Actually Has to Change?
A glitter lamp and a lava lamp can use a similar-looking heated base, but the contents behave very differently.
A glitter lamp circulates reflective particles through liquid. A traditional lava lamp uses a formulated wax blend surrounded by liquid. As the wax heats and cools, its buoyancy changes relative to that surrounding liquid, producing the familiar rising and falling motion. My complete lava lamp refill and restoration guide explains that process in more detail.
For this conversion, I had to deal with five separate systems:
- The old glitter fluid and residue
- The replacement wax and surrounding liquid
- The heating system
- The flow adjustment
- The cap and stopper
Step 1: Opening the Vintage Glitter Lamp
The first challenge was getting inside the globe without damaging the glass or destroying the original decorative cap.
Vintage lamps do not all use the same sealing system. Some have bottle-style caps, some have rubber plugs, and some use combinations that are difficult to remove without bending or damaging something.
This globe used a closure that I could not simply replace with a standard crimped bottle cap. That meant I needed to preserve the parts I could reuse while finding a modern stopper that would create a secure fit inside the neck.
Before opening any lamp:
- Unplug it.
- Allow it to cool completely.
- Work over a protected, stable surface.
- Never heat a sealed globe.
- Do not use a lamp if its globe, cord, socket, or base is damaged.
My broader lava lamp restoration guide includes additional safety notes for opening, heating, cleaning, and resealing a globe.
Step 2: Removing the Original Glitter Fluid
The original contents were not just water with craft glitter dumped into them.
The fluid in this particular lamp had a strong odor that reminds me of old people. It behaved differently from ordinary water, and left residue that needed to be completely removed before I could add wax.
I drained the old contents into a separate container rather than pouring them directly down a sink. If you are working on an unidentified vintage lamp, treat its contents as unknown and check your local disposal rules rather than assuming they are harmless.
Step 3: Cleaning Every Last Piece of Glitter
I underestimated this step.
Glitter has two natural states:
- Inside the object where it was intentionally placed
- Everywhere else in your known universe… forever
Any glitter, oil, cleaner, dye, or residue left inside the globe can affect the appearance of the finished lamp. It can also contribute to cloudiness or interfere with how the new wax interacts with the glass.
I tested multiple cleaning methods before finally getting the bottle clear enough to rebuild. A long-handle bottle brush made it much easier to reach the bottom and curved interior of the globe. However our 420 friends really came in clutch with the alcohol and salt suggestion.
The most important lesson was not finding one magical cleaner. It was repeating the cleaning process until the bottle was genuinely clear (this usually means abour 3-5 rinses)
Step 4: Adding Lava Lamp Wax and Fluid
For the new internals, I used a premixed wax system from Lava Lab Creations.
Use code MISFIT10 for 10% off.
I have used Lava Lab Creations materials successfully in other restorations, including my complete standard lava lamp refill guide and my much larger Grande lava lamp restoration.
A premade restoration blend does not remove all experimentation, but it gives you a much more consistent starting point than attempting to formulate wax from random household ingredients.
The wax, surrounding liquid, globe size, surfactant level, and even things like the temperature of your room all affect the final behavior.
Change one of those variables and the lamp may flow differently. Change all of them simultaneously and you are going to be left confused what to adjust next.
Step 5: Finding a Stopper That Would Actually Seal
The original closure became one of the most annoying parts of the entire conversion as I had a assumed we were done!
A standard cap did not create the fit I needed, and simply crimping something over the top was not enough to solve the internal seal.
I eventually experimented with laboratory-style rubber stoppers. The rubber cork assortment I used gave me multiple sizes to test instead of forcing one almost-correct plug into a vintage glass opening.
A stopper needs to fit securely without requiring enough force to damage the neck of the globe. It also needs to remain stable as the lamp heats and the contents expand.
Do not assume that the stopper used for this lamp will fit another Wizard globe. Measure the actual opening and inspect the glass before selecting a replacement.
Step 6: Choosing the Bulb
Heat is not merely what turns the lamp on.
Heat controls the entire performance of the wax.
This is the bulb I used for this project after realizing the 30 watt bulb it shipped with was not getting hot enough.
Too little heat and the wax may soften without rising at the bottom of the globe.
Too much heat and the wax can collect near the top, break into overly small pieces, or lose the slower movement you were trying to create.
The goal was not maximum heat.
The goal was just enough heat to establish a reliable convection cycle without cooking the lava to a crisp (which I have done in the past).
Step 7: Adding a Dimmer
The plug-in dimmer was something I got a lot of recommendations to try and while it was not a magic bullet here it can be fun to play around with for adjusting flow.
A bulb gives you a fixed maximum output. A dimmer lets you make smaller adjustments once the lamp is close to working.
That was especially helpful because I was not working with an untouched factory globe. I had changed the wax, liquid, stopper, fill level, and overall thermal behavior.
The dimmer allowed me to bring the lamp up to temperature and then reduce the heat once the wax began moving.
A dimmer should never be used to exceed the rated wattage of the lamp. It only reduces the power being delivered to a compatible bulb.
Step 8: Tuning the Lava Flow
This was the part that turned a restoration into a three-month science project.
A lamp can be technically functional while still flowing terribly.
During testing, I encountered:
- Wax that refused to rise
- Wax that rose but stayed at the top
- Large blobs that would not separate
- Tiny pieces moving too quickly
- Wax that wanted to stick to the glass
- Flow that looked promising and then changed after the lamp fully heated
- Multiple occasions where I believed I had fixed it and was immediately humbled….
The most useful thing I learned was to change one variable at a time.
After changing the heat or adding a flow-adjusting ingredient, I gave the lamp time to reach a new stable state before touching anything else. In many tests, that meant waiting around 30 minutes between meaningful adjustments.
This is extremely boring advice.
It is also much faster than changing three things, ruining the flow, and then spending the next day trying to identify which decision betrayed you.
In the end it was the surf from Ozone that helped me get this lamp dialed in and gooey!
Why Did the Conversion Take Three Months?
It did not require three months of continuous labor.
It required three months of:
- Testing
- Heating
- Cooling
- Cleaning
- Waiting for replacement parts
- Trying different closures
- Revisiting the project
- Making one adjustment
- Waiting again
- Getting excited that I had solved it…
- Discovering that I had not solved it…
Lava lamp experimentation contains a lot of forced downtime because you cannot accurately evaluate every change immediately.
The lamp needs time to warm up fully. It then needs time to cool before it can be safely opened or adjusted again.
A large portion of this project was spent staring at a glowing bottle and asking whether the blob looked more emotionally available than it did yesterday.
Can Any Glitter Lamp Be Converted Into a Lava Lamp?
No, not automatically. But also kind of…
A successful conversion depends on things like the shape and condition of the globe and if the glass is heat safe of course and ultimately if the base can support an incandescent bulb safely.
Some glitter lamps may be poor candidates because:
- The globe is too narrow or oddly shaped
- The base cannot safely provide suitable heat
- The glass is damaged or not heat rated
- The opening cannot be reliably resealed
- Replacement parts are unavailable
- The lamp has sentimental or collectible value that outweighs the experiment
In this case, the Wizard was a reasonable candidate partly because the Wizard line historically existed in both glitter and lava configurations. That does not mean every Wizard globe can be converted using an identical recipe.
Was Converting the Wizard Lamp Worth It?
Yes!
It took much longer than expected, and there were several points where returning it to a glitter lamp would have been easier.
But the finished lamp kept the recognizable vintage Wizard design while gaining the slow, organic motion of a traditional lava lamp.
More importantly, the project gave me a much clearer understanding of how heat, sealing, cleaning, and flow tuning work together.
Would I do another one?
Unfortunately for everyone involved, probably….
Would I assume the next one will be easier?
That sounds like something I would say immediately before beginning another three-month project.
Supplies Used in This Project
Some of these links are affiliate links. I may earn a commission from qualifying purchases at no additional cost to you.
Lava Lamp Wax and Restoration Supplies
Lava Lab Creations
Use code MISFIT10 for 10% off.
Rubber Stoppers
Rubber cork and stopper assortment
Check the measurements of your own globe before ordering. Vintage openings and closures can vary.
Bulb
Confirm the wattage, bulb shape, socket type, voltage, and maximum rating printed on your own lamp before using a replacement.
Plug-In Dimmer
Dimmer plug used for flow control
Use only with compatible dimmable incandescent bulbs and within the dimmer’s listed electrical rating.
Bottle Brush
Particularly useful for reaching residue near the bottom and shoulders of taller globes.
You can also find more tools, supplies, and equipment from my videos on the Misfit Printing product links page.
Frequently Asked Questions
How old are Lava Lite Wizard lamps?
The documented Wizard series was produced approximately from 1998 through 2003. An individual lamp may have a more precise production code on its original cap.
Can you put lava lamp wax inside a glitter lamp?
Sometimes, but it is not a direct swap. The globe must be cleaned, the wax and liquid need to be compatible, the base must provide appropriate heat, and the lamp must be safely resealed.
What bulb does a vintage Wizard lamp use?
Collector documentation lists the Wizard line with an S11 40-watt bulb. However, you should always follow the electrical rating printed on your specific lamp because components may have been replaced or modified over time.
Why use a dimmer on a lava lamp?
A dimmer allows you to reduce heat after the lamp warms up, which can help fine-tune flow when a lamp runs too hot. It does not increase the lamp’s maximum power and should only be used with compatible bulbs and equipment.
Why was the lamp cloudy after cleaning?
Cloudiness can come from leftover glitter fluid, cleaning residue, contamination, minerals, or material left inside the globe. Thorough cleaning and distilled water provide a more controlled starting point. My full lava lamp refill guide includes additional cloudy-fluid troubleshooting.
Is this a beginner lava lamp project?
Ideally would not make it a first restoration but at the end of the day anything can be a beginner project. A standard refill with a compatible restoration kit is easier because you are working from an existing lava lamp configuration rather than converting an unidentified glitter system.
Start with my complete lava lamp refill guide or browse the rest of my lava lamp projects and restoration posts.
Final Thoughts
This project started with a vintage glitter-filled Wizard lamp and one deceptively simple question:
Can I turn this into a real lava lamp?
The answer is yes.
The more complete answer is yes, provided you are willing to clean glitter out of places glitter should not physically be able to reach, develop strong opinions about rubber stoppers, and wait three months for a lamp to cooperate.
The finished lamp works, the viewer’s Wizard has an entirely new life, and I now know substantially more about glitter-lamp conversion than I ever intended to learn.
That is basically the entire mission of Misfit Printing: start with a strange idea, document the failures, and keep adjusting things until the weird object finally works.
More Lava Lamp Projects
Shop Products and Supplies From Misfit Printing Videos
Fix and Refill a Lava Lamp: Complete Step-by-Step Guide
How to Restore a Grande Lava Lamp
Browse All Misfit Printing Lava Lamp Posts
Leave a Reply